Bulk-Editing Client List
You can utilize our Bulk Options feature to quickly make changes to several of your clients in one place or to convert a client profile to a contact card for another client.
Step 1: Navigate to the Clients tab.
Step 2: Click on the Bulk Options button.
Step 3: Adjust the status filter to view All Clients.
Step 4: Go through your list of clients and adjust the status for all active clients.
- Click the SAVE button next to each client whose status has been adjusted.
Once you've gone through your client list and set the correct ones to active, you can now go through and assign the contacts to the appropriate clients.
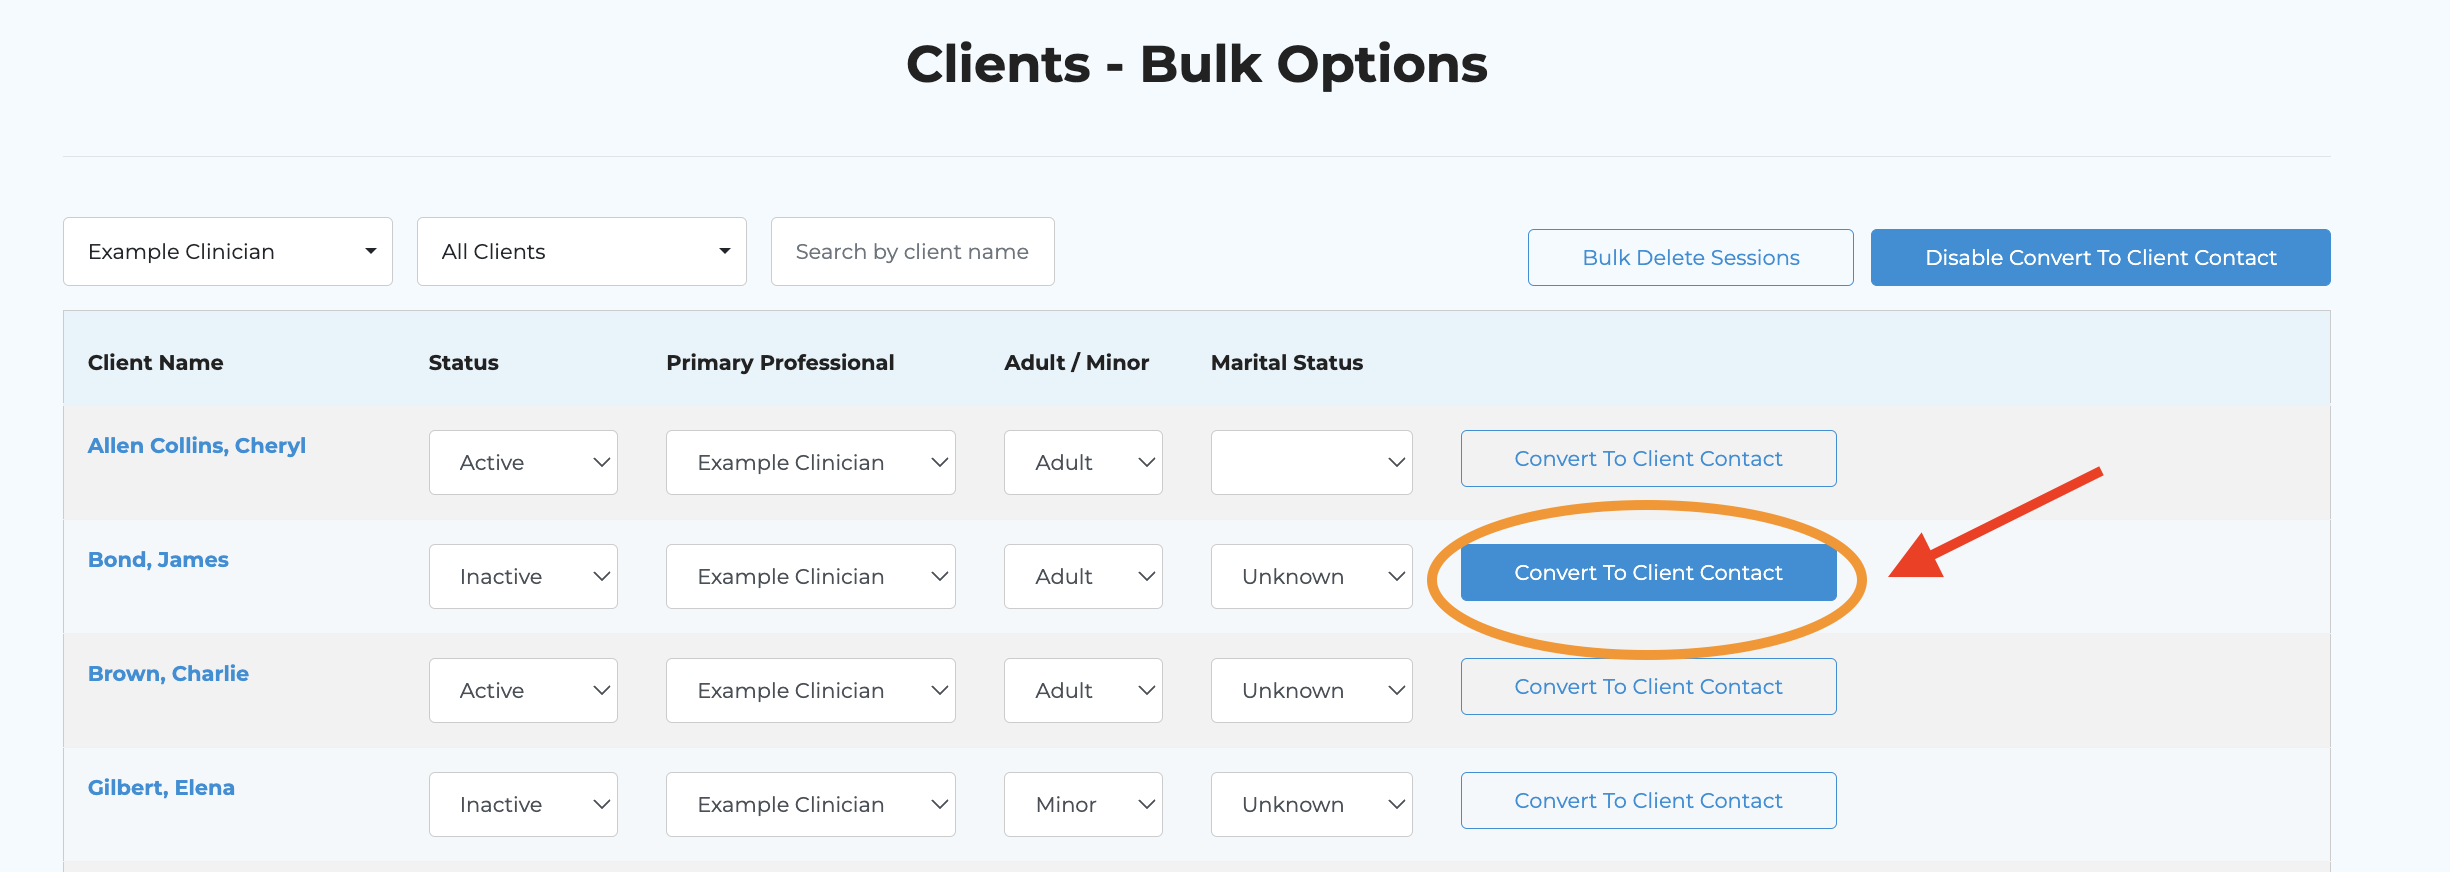
Step 5: Enable Convert to Client Contact
Step 6: For each contact that is listed as a client, click on the Convert to Client Contact button
 Step 7: Click on the client dropdown field to select the appropriate client from the list.
Step 8: Select the appropriate relationship from the dropdown.

During this step, you can add any additional contact information for the client and/or add a note to be assigned to the contact card (e.g., ROI signed; contact in case of emergency; etc.)
Step 9: Type "Convert" into the field to confirm this action and then press Submit
The contact has now been added to the selected client's Contact Info tab.

If you need to grant this contact access to the Client Portal, simply navigate to the Client Portal tab and click +Add New User. If an email address was added for this contact, you will be able to select it from the dropdown.
Related Articles
Client Portal: View Upcoming Appointments
Now, clients can view a list of upcoming appointments by selecting the More button on the right-hand side of their Next Appointment on the client portal.Client Balances Report Within the To-Do List
Step 1: Navigate to the To-Do list on the main menu. Then, select the tab labeled Client Balances. Here you'll find five search boxes designed to outline your search parameters. The middle box dictates which report you would like to run. Client ...Bulk-Deleting Sessions
Bulk Deleting Appointments in Client Management System Step 1: Access the Clients List Navigate to the clients list in the management system. Step 2: Select Bulk Delete Sessions Click on the 'Bulk Options' button. Step 3: Click on the 'Bulk Delete ...Creating Bulk Invoices
You now have the ability to easily create bulk invoices for clients seeing multiple clinicians. Step 1: Click on the Create Invoice button in the menu bar. Step 2: Click on the "Bulk Invoice" button in the bottom left-hand corner of the pop-up ...Updating Client Status
Navigate to the Client Overview page within their chart. Then, scroll down to Status. Here, select the drop-down and choose the client's updated status. I.e., Inactive, Active, Wait List, Prospect.