Customizing Interventions
STEP 1: Navigate to the CODES & METRICS tab within the Account Settings section.
STEP 2: Review list of global Interventions and activate any of the ones already in the account or add additional ones as needed.
● Within the Codes & Metrics tab, click on the Interventions header.
● Review the list of global Interventions.
○ For any that you would like to activate or add to, click on the "Edit Intervention" button.
○ By clicking the "Active" button next to each desired intervention, you'll be able to use them within the session notes. Within this screen, you can also make edits to the pre-populated text or add additional interventions down below by pressing +Add Additional Intervention

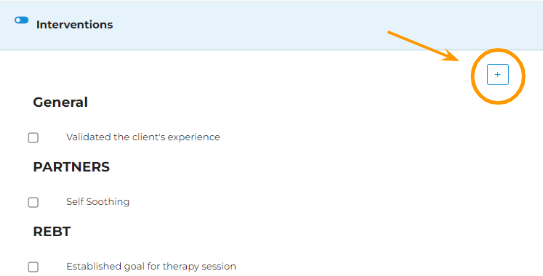
Once you have activated the necessary interventions, these should populate on the session note. However, if you do not see them on a specific note, you will be able to add them by clicking on the + button within the note’s interventions section (example below).

Related Articles
AI Notes
Overview of the AI Notes Feature What AI Notes Can Do Best Practices for Getting Accurate AI‑Generated Notes Enrolling in AI Notes - Practice Level How to Enable AI Notes for Your Organization Managing User Access and Permissions Enrolling in AI ...Paste Previous Note Options
There are two options at the Practice Settings level regarding the "Paste Previous" note feature: Previous Note Select from 5 Previous Notes Please note: this is a global setting for all professionals within the account. After scheduling an ...How to Create a Treatment Plan
Step 1: Navigate to the client’s appointment and select Add Note. Step 2: Open the Diagnosis tab. Then, select Treatment Plan. Here you can select a type of treatment plan, add dates, and select Save. Select New Plan to create a new treatment plan. ...Treatment Plan Overdue Within To-Do List
Step 1: Navigate to the To-Do List page by selecting the To-Do tab from the main screen. Then, select TX Plan Overdue. Step 2: Update the variables by selecting clinician(s) and entering the amount of days overdue. Step 3: Select the client’s name to ...Missing Session Notes within the To-Do List
Navigate to the To-Do List tab in the menu bar and select the Missing Session Notes tab on the left-hand side. Then, click Add Note next to the desired appointment If the session should be marked missed, select . Then, make any necessary changes to ...