AI Notes
- Overview of the AI Notes Feature
- What AI Notes Can Do
- Best Practices for Getting Accurate AI‑Generated Notes
- Enrolling in AI Notes - Practice Level
- How to Enable AI Notes for Your Organization
- Managing User Access and Permissions
- Enrolling in AI Notes (Basic Users)
- How to Join AI Notes if Enabled by Your Admin
- Custom Notes with AI Prompts
- Accessing Your AI Prompt Settings
- Customizing Note Structure and Sections
- Setting Preferences for Tone, Detail Level, and Formatting
- Configuring What AI Should Pull from Sessions
- Resetting or Updating Your Preferences
- Using AI Notes in Daily Workflow
- Starting an AI‑Assisted Note
- Editing, Reviewing, and Finalizing AI‑Generated Notes
- Adding Manual Content
AI Note Overview
- Provide Clear, Structured Input
- Share the session details in a logical order (presenting concerns → interventions → client response → progress).
- Use short, direct sentences to reduce ambiguity.
- Include only clinically relevant information.
- Stick to Objective, Observable Language
- Describe what the clinician saw, heard, or did, not interpretations.
- Avoid emotional or speculative phrasing unless clinically appropriate.
- Specify the Desired Format
- Tell the AI exactly what structure you want (SOAP, DAP, progress note, brief note).
- If you have a custom template, mention the section names.
- Highlight Key Priorities
- Call out essential elements like risk, safety planning, homework, or goal progress.
- Note any changes from previous sessions.
- Review and Revise
- Read the draft for accuracy and alignment with your clinical judgment.
Enroll in AI Notes - Practice Level


Enroll in AI Notes (Basic User)
Step 1: Navigate to Account Settings - Staff & Users. Then, select the appropriate professional name.
Step 2: Select the Telehealth / AI Notes tab. Then, check Use AI Notes. *must be enrolled in telehealth first.
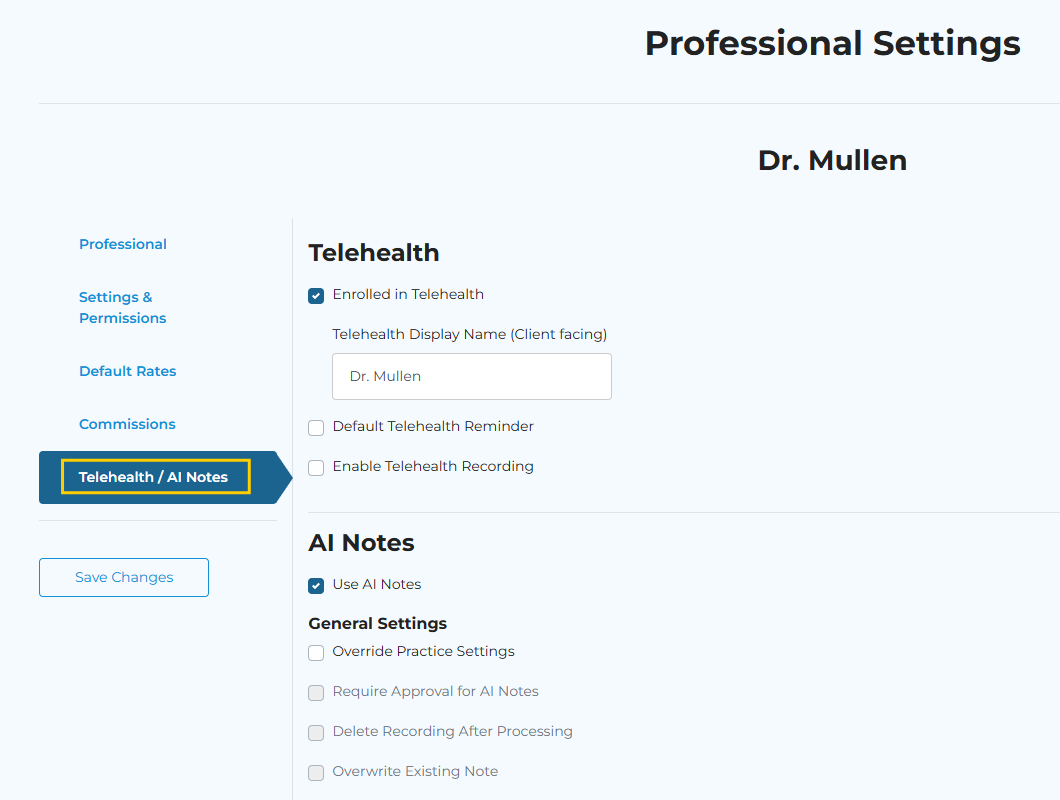
Step 3: General Settings / Note Format
Creating a Custom Note with AI Prompts
Using AI Notes in Daily Workflow
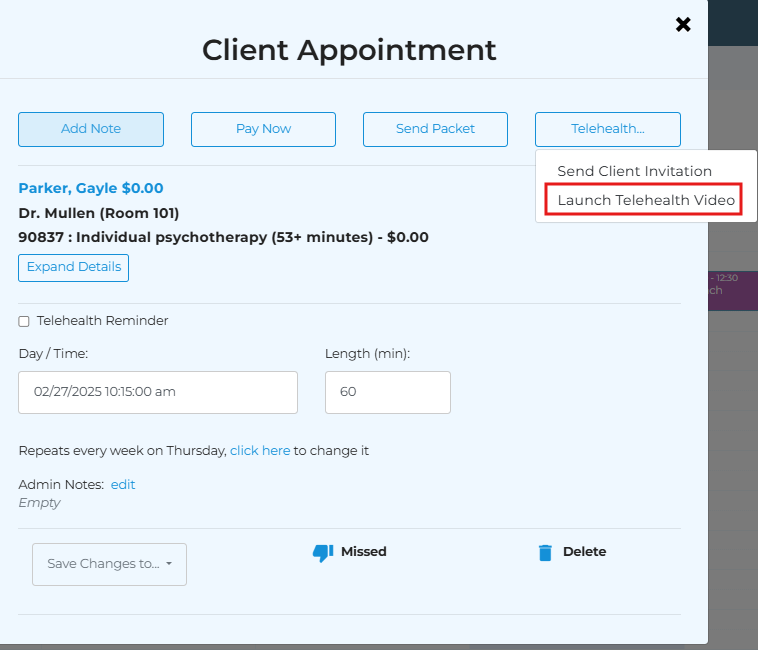
Step 1: Select the session from your calendar. Then, ‘Launch Telehealth Video’
*Telehealth video is accessible 20 minutes before the appointment start time.
Step 2: Select Join to open the telehealth platform and access the record button.
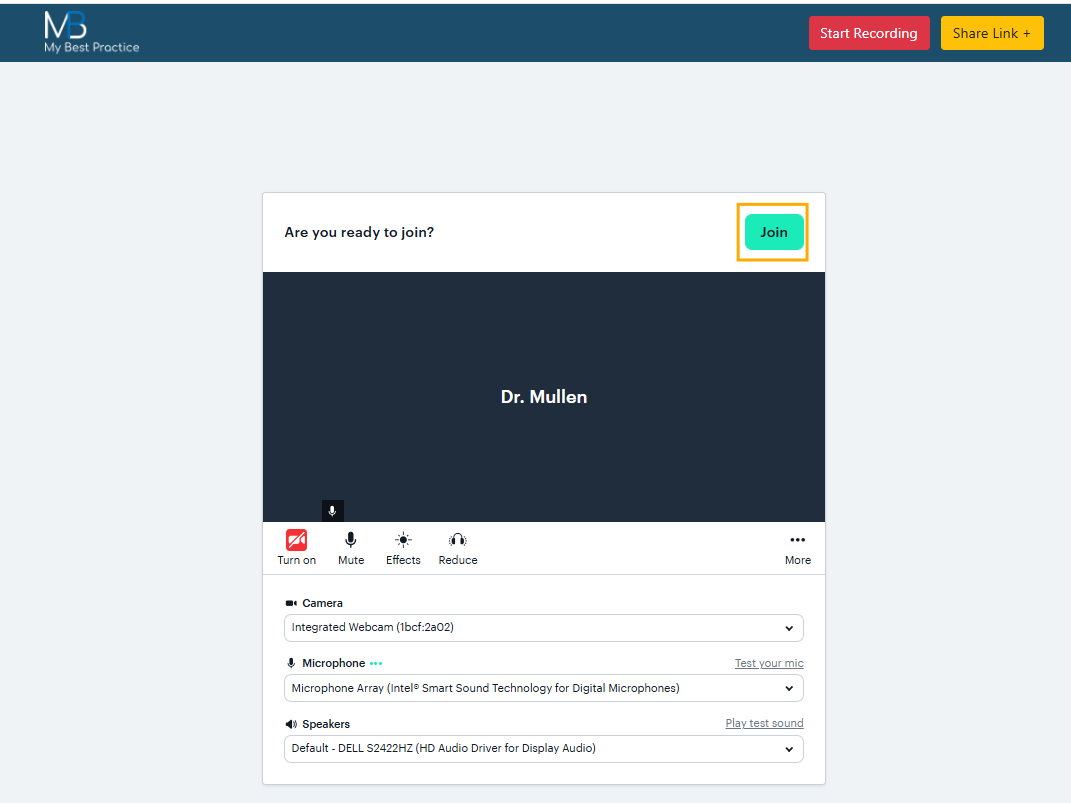
Step 3: Select record and begin the session. You will know the session is recording when you see ‘Recording 00:00’
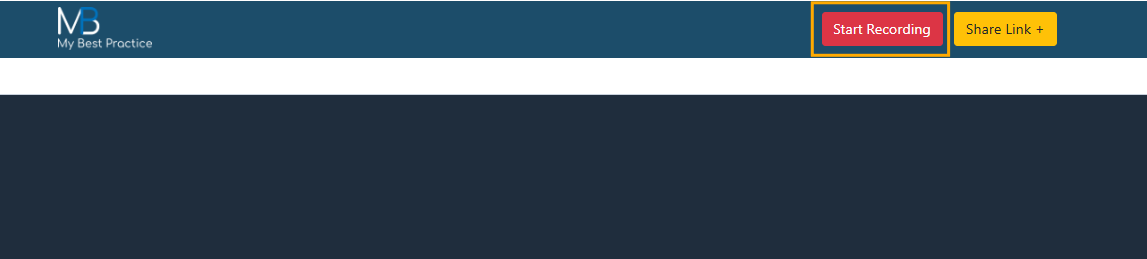
Step 4: When the session concludes select ‘Stop Recording’ and ‘leave’ the telehealth session.

Step 5: Navigate to the To Do List. Select AI Notes. Then, filter to review pending AI Notes.
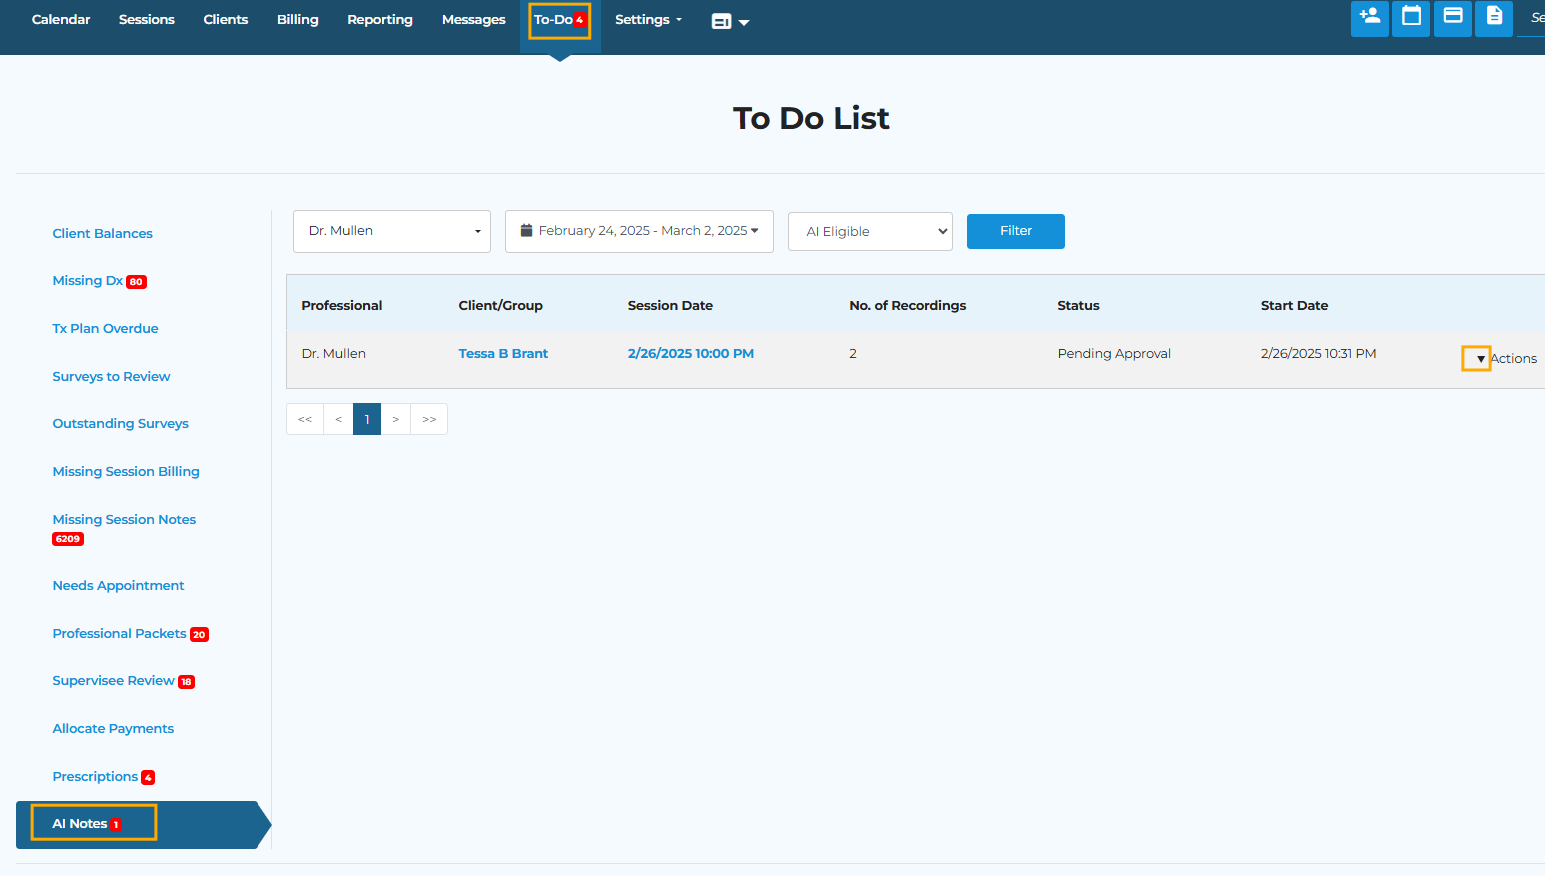
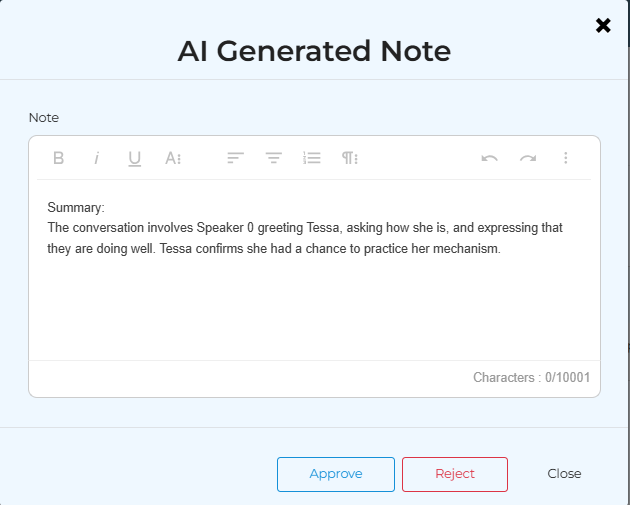
Step 6: Select the Action drop-down to review the note. Then, select Approve or Reject.
Once approved, the note will populate in the session note.
Related Articles
Note Status Report
Run a report to discover the status of your notes. Step 1: Navigate to the Reporting page and select Note Status Report. Step 2: Filter by professional, date range, note status. Then, select Filter. Totals for each note type will show above the list. ...Missing Session Notes within the To-Do List
Navigate to the To-Do List tab in the menu bar and select the Missing Session Notes tab on the left-hand side. Then, click Add Note next to the desired appointment If the session should be marked missed, select . Then, make any necessary changes to ...Adding / Editing Admin Notes within an Appointment
Quickly add and view administrative notes within your client appointments to provide more context or to include important reminders. Step 1: Create an appointment on the calendar and select add under Admin Notes:. Step 2: A rich text field will ...Paste Previous Note Options
There are two options at the Practice Settings level regarding the "Paste Previous" note feature: Previous Note Select from 5 Previous Notes Please note: this is a global setting for all professionals within the account. After scheduling an ...Events Tab
The Events tab in My Best Practice is your centralized timeline for all clinical activity—both session‑related and non‑session events. It brings together progress notes, administrative actions, and practice‑wide documentation in one clean, filterable ...