Client Document Upload Notification
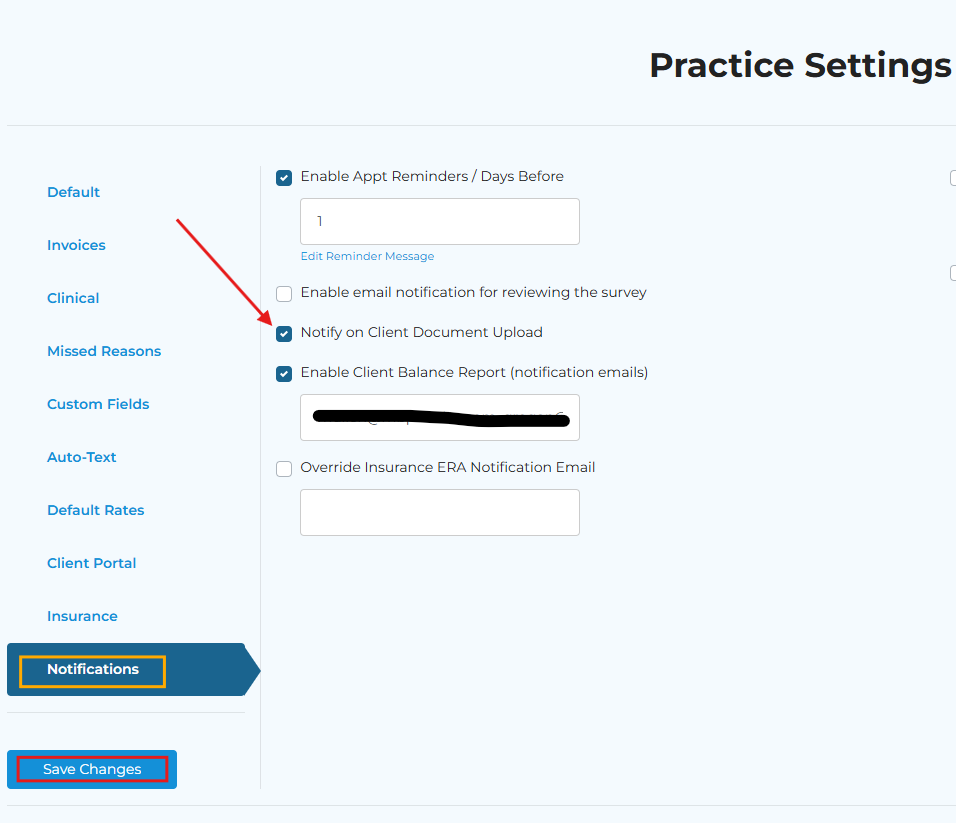
Navigate to your Settings - Account Settings - General. Then, select Edit under Practice Settings.
Once in Practice Settings, select the Notifications tab. Then, check the box labeled 'Notify on Client Document Upload'.
Related Articles
Adding a Collateral Client to an Appointment
Collateral clients added to a primary client’s session, will not have a record of the session in their chart or be billed. If you prefer to have a record for both clients see Creating Client or Staff Groups. Create a new session and add the primary ...Adding a Client
Step 1: select the Add Client button at the top right. Step 2: complete all of the necessary information to enroll your client. To quickly add a client to the system you only need their name. Uncheck “Enroll in Client Portal” See Enrolling Contact in ...Creating New Clients
STEP 1: Click the icon in the top right-hand corner - OR - click on the + New Client button within the Clients tab. STEP 2: Enter applicable information into the pop-up window Select the appropriate professional from the dropdown First and Last Names ...Client Portal: View Upcoming Appointments
Now, clients can view a list of upcoming appointments by selecting the More button on the right-hand side of their Next Appointment on the client portal.Notification on Over Due Metrics
Overview To help teams stay on top of outstanding client surveys, the Metrics tab now displays a clear alert whenever a survey becomes overdue. This update ensures users can quickly identify items that require follow‑up and maintain accurate ...