Secondary Insurance
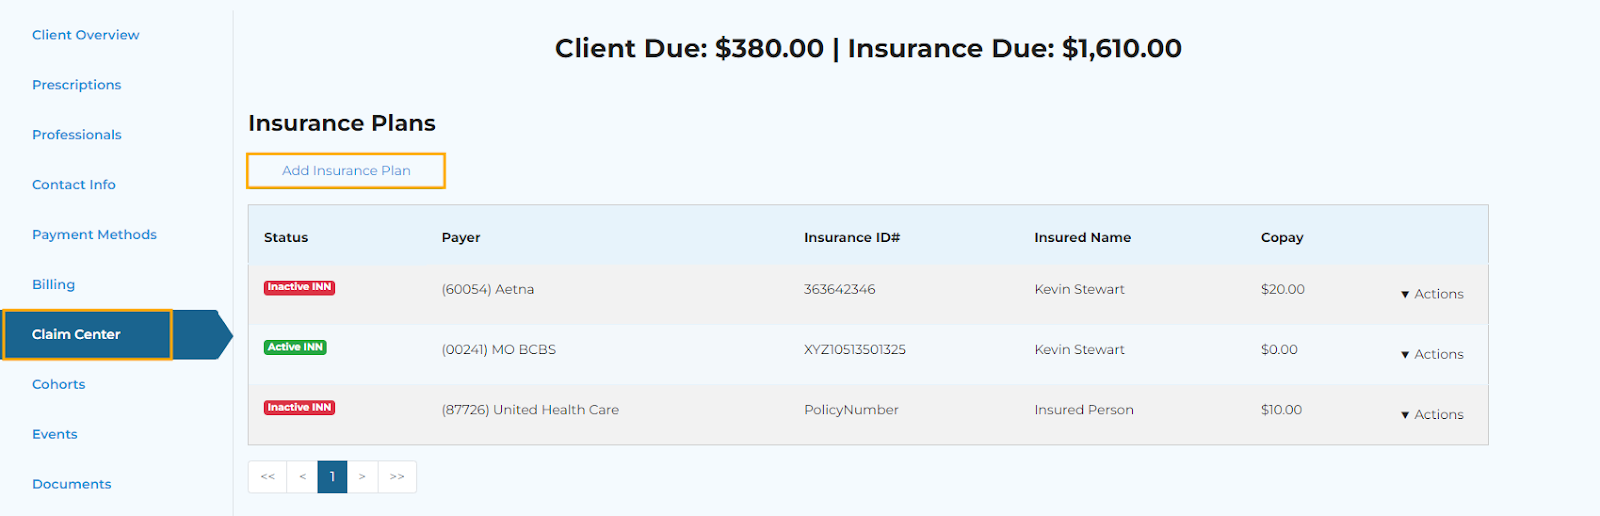
Step 1: Navigate to the client’s Claim Center tab in their chart. Then, select Add Insurance Plan.
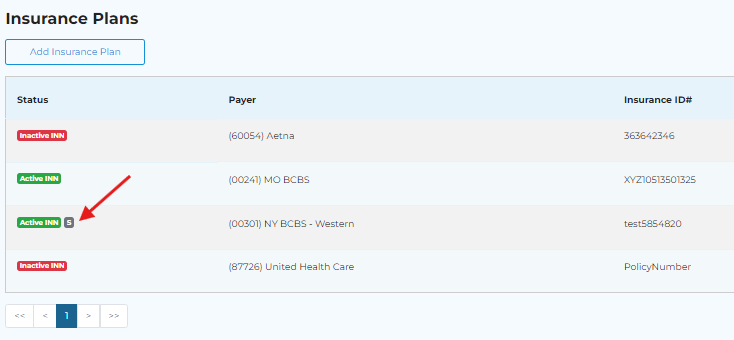
Step 2: Once you have added all of the necessary insurance information, check off Secondary and then, select Add Insurance Plan.
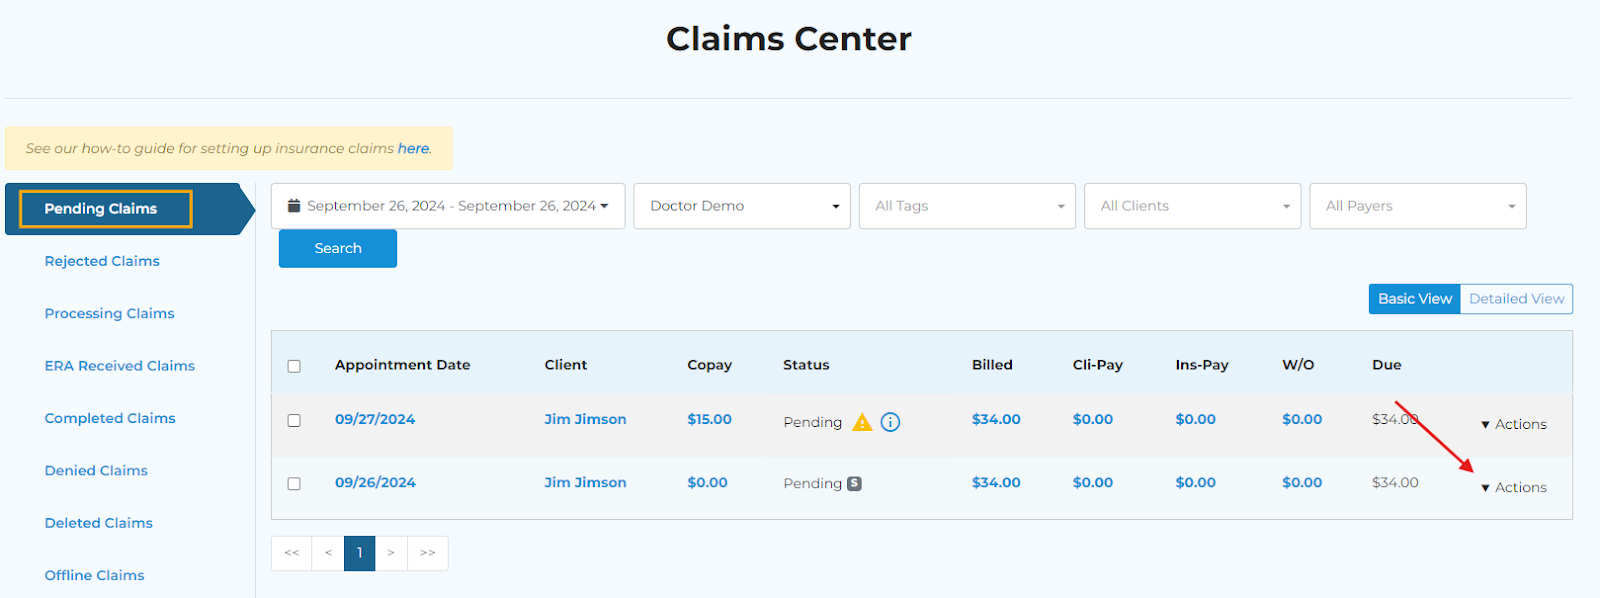
Step 3: Select the Actions drop-down. Then, File Claim.
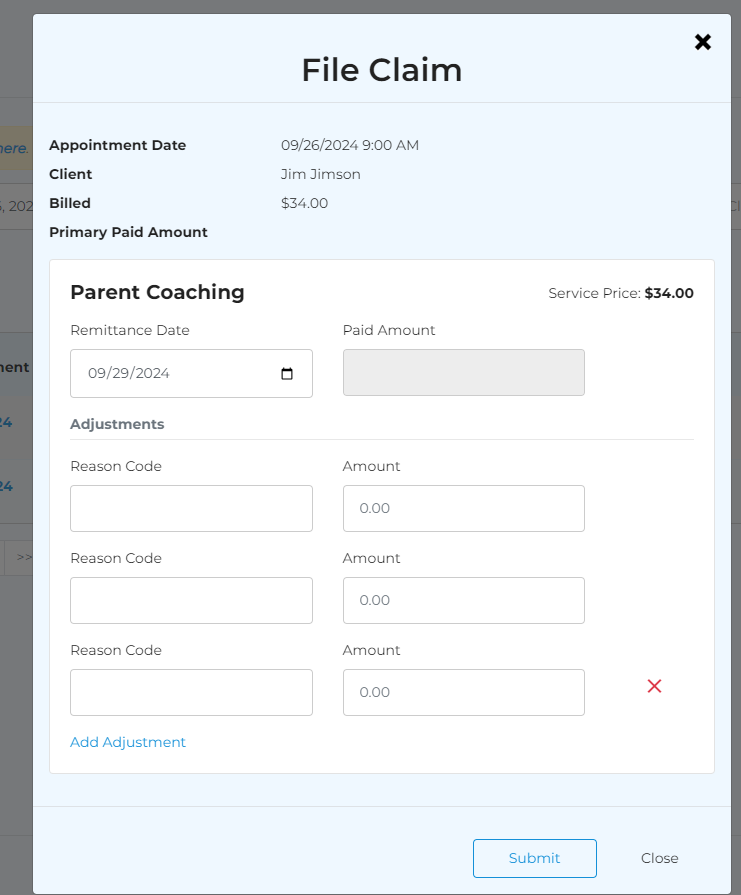
Step 4: add your adjustment reason(s) and amount(s). Once this is completed, select Submit.
Related Articles
Insurance Automation Options
Users can choose to automate many insurance processes by navigating to Settings - Account Settings - Practice Settings - Insurance. Auto File Claims: when enabled claims will be submitted automatically once all necessary items are complete (note, ...Setting the Default Insurance Type for the Practice
Overview Your practice can choose which insurance plan type is automatically selected when adding a new insurance plan to a client chart. Setting a default helps streamline data entry, reduce errors, and maintain consistency across your team. What ...New Options for Insurance Auto-Posting
You can now enable Auto-Update Patient Responsibility within your Practice Settings to have the system automatically adjust the amount listed as the copay for the clients’ appointments based on the patient responsibility indicated on the ERA ...Packet Prompt - Add Payment Method and/or Add Insurance Plan
Now, professionals can add a prompt to collect payment methods and insurance plans during the intake packet process. These details will automatically populate on the chart when the packet is complete. First, enable 'Collect Payment Method' and/or ...Preventing Specific CPT Codes from Generating Insurance Claims
Within the CPT code settings, you can now indicate whether you want the system to prevent the creation of a claim encounter for any appointment with that code pulled through. Step 1: Navigate to Account Settings - Codes & Metrics. Step 2: Select Add ...