Syncing to Google Calendar (One-Way & Two-Way Sync)
STEP 1: Navigate to the Staff & User Settings of your account within the Settings tab in the menu bar.
STEP 2: In the General section of your Staff & User settings, click on the “Google Calendar Sync” button.
STEP 3: A new tab will populate in your browser, advising you to sign in with your Google account credentials.
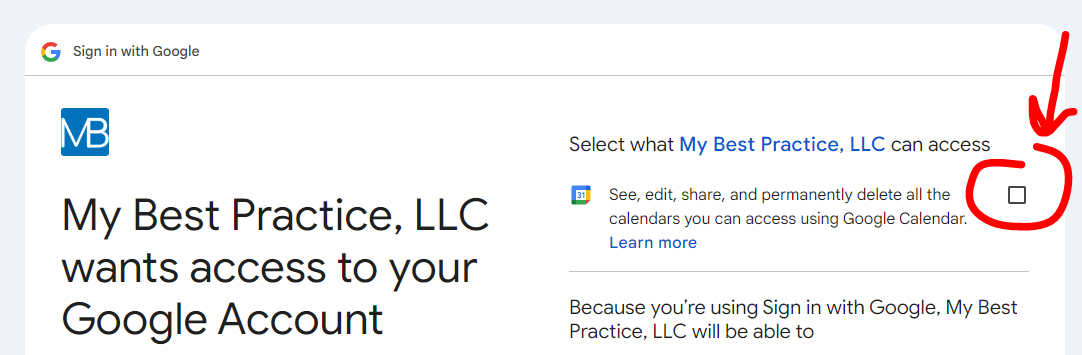
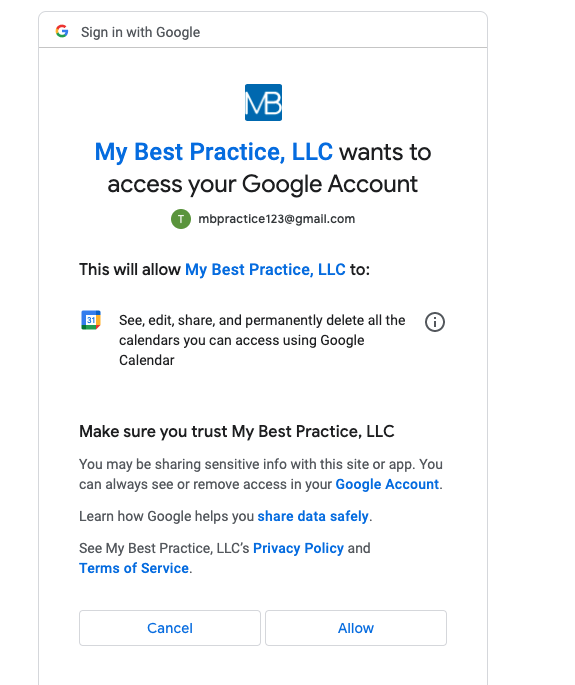
STEP 4: Once you have logged in, you will need to give My Best Practice permission to access your Google Calendar by checking the box circled below. Then, pressing the "Allow" button.
If you do not check the box circled below, you will receive an error message and will return to the sync page to re-enroll.
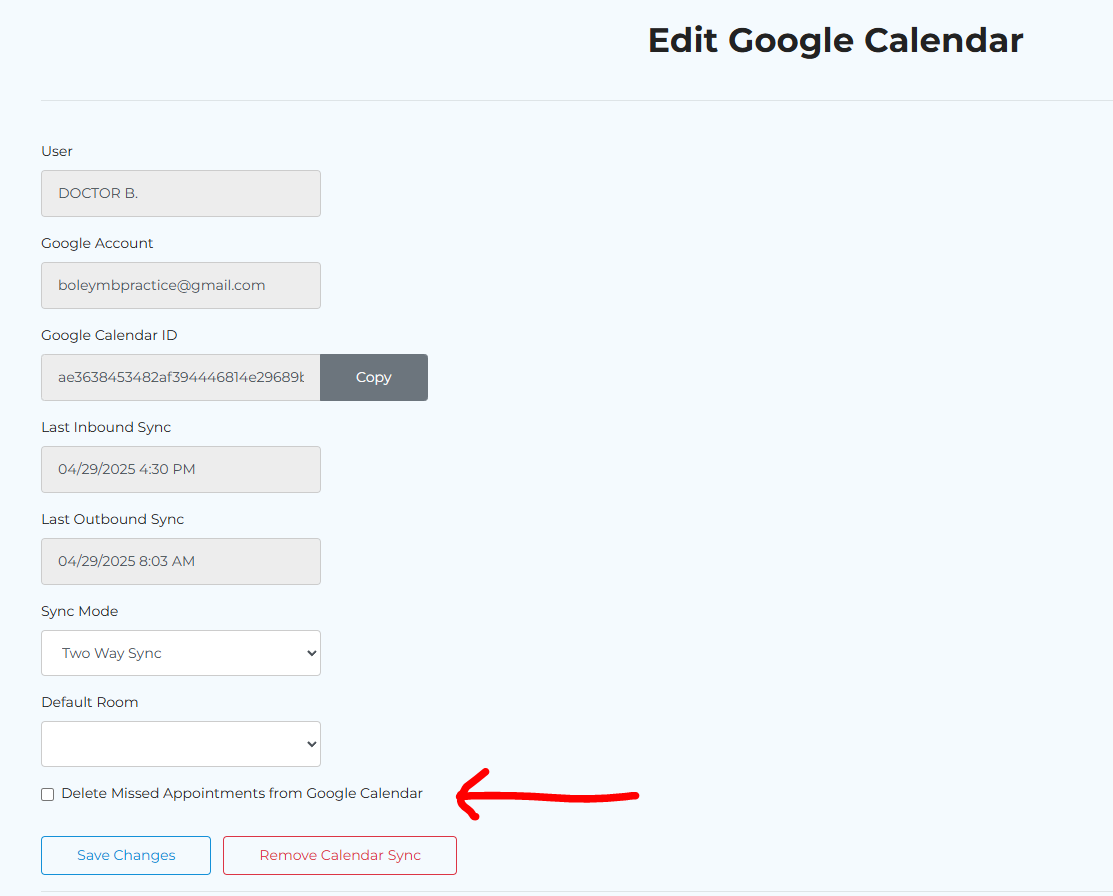
STEP 5: After granting MBP access to your Google calendar. you will be brought back to the "Edit Google Calendar" page within your account.
Here, you will need to select which type of sync mode you'd like to utilize.
One-Way Sync
This will display all of the appointments entered into your calendar within MBP on your Google Calendar. However, you will not be able to edit or delete them within Google. All changes must be made within the calendar in your MBP account.
Two-Way Sync
This will also display your MBP calendar within your Google Calendar, but you'll be able to make adjustments to the date/time and you can delete appointments straight from your Google Calendar. Any changes made within your Google Calendar will reflect within your MBP calendar.
NEW appointments created on your MBP calendar within Google will show up on the calendar within your MBP account as a "Non-Client Appointment" as a placeholder. You'll want to create the appropriate client appointment within your MBP account and then delete the "Non-Client Appointment." It will then reflect accurately in your Google Calendar.
Recurring appointments must be created within your MBP account.
Note: Once you’ve created the recurring appointment series in MBP, you can adjust individual appointment times from Google Calendar. Keep in mind that doing this will only move that individual appointment. The appointment will be broken off from your regular recurring series, and the rest of the series will remain unaffected. If you need to adjust the entire recurrence, you'll need to do so through your MBP account.
Now, you can choose a default room if you prefer.
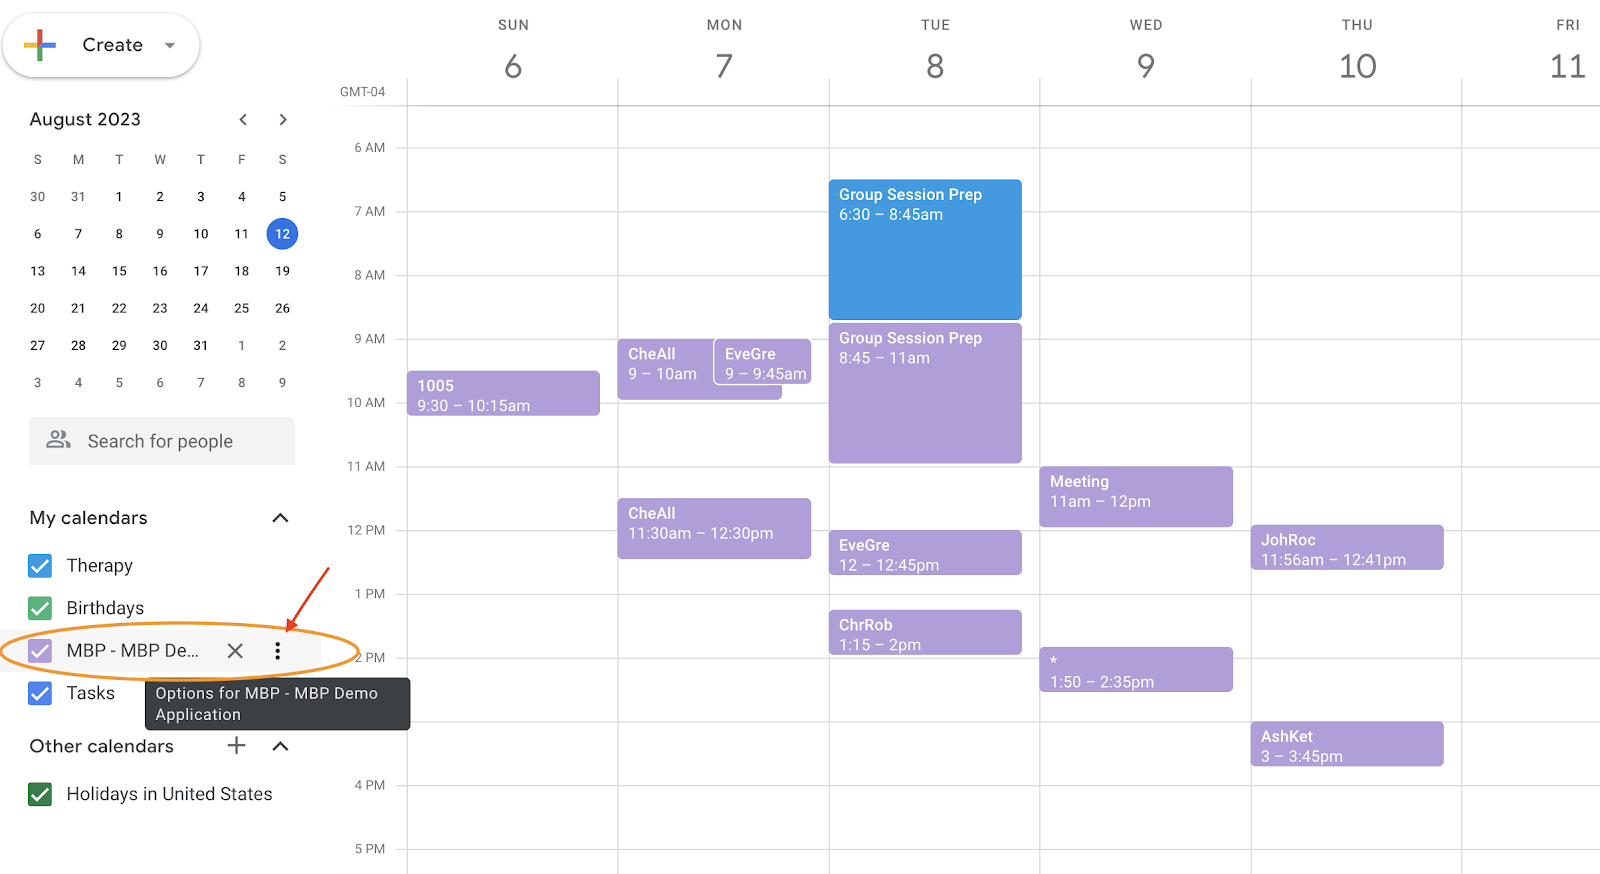
When hovering over the MBP calendar in the “My calendars” list, you can click on the three vertical dots button to make changes to the settings (e.g., change the color of the calendar entries).
If you want to change the name of the calendar or make any other changes to the settings click on “Settings and sharing” to be directed to the settings page.

Related Articles
Understanding MBP's Two-Way Sync with Google Calendar
SPECIFICS OF TWO-WAY SYNC If you have not yet done so, please see the instructions for setting up your MBP calendar for two-way sync with Google calendar here: Syncing to Google Calendar IMPORTANT - The two-way sync functionality exists only for the ...Changing from One-Way to Two-Way Google Calendar Sync
STEP 1: Navigate to your Professional/User Settings under the Settings tab. Note: For account administrators, click on the "Staff & Users" tab to see the professional/user settings. STEP 2: Click on Active under the Calendar heading on the ...Re-Syncing Google Calendar
STEP 1: Navigate to My Settings under the Settings tab. Note: For account administrators, click on Account Settings - Staff & Users tab to see the professional/user settings. STEP 2: Click on Setup Sync under the Calendar heading on the right-hand ...Missed Sessions Reason Report
Overview How to Run the Report How to add Custom Missed Reasons The Missed Sessions Reason Report helps practices track when and why client appointments were missed. This report provides clear visibility into cancellation patterns, no‑show trends, ...Adjusting Calendar Settings
STEP 1: Navigate to the Calendar tab. STEP 2: Click on the three horizontal lines icon in the top left-hand corner of the calendar to generate the Calendar Settings pop-up. STEP 3: Make the desired changes to your calendar settings. Professional(s): ...