Turning on Allocated Payments for Receipt Including Payments
Step 1: Navigate to Settings - Account Settings - Practice Settings
Step 2: Select the Invoices tab and choose the dropdown under 'Make this a receipt including payment(s)'.
Step 3: Select 'Allocated Payments'.
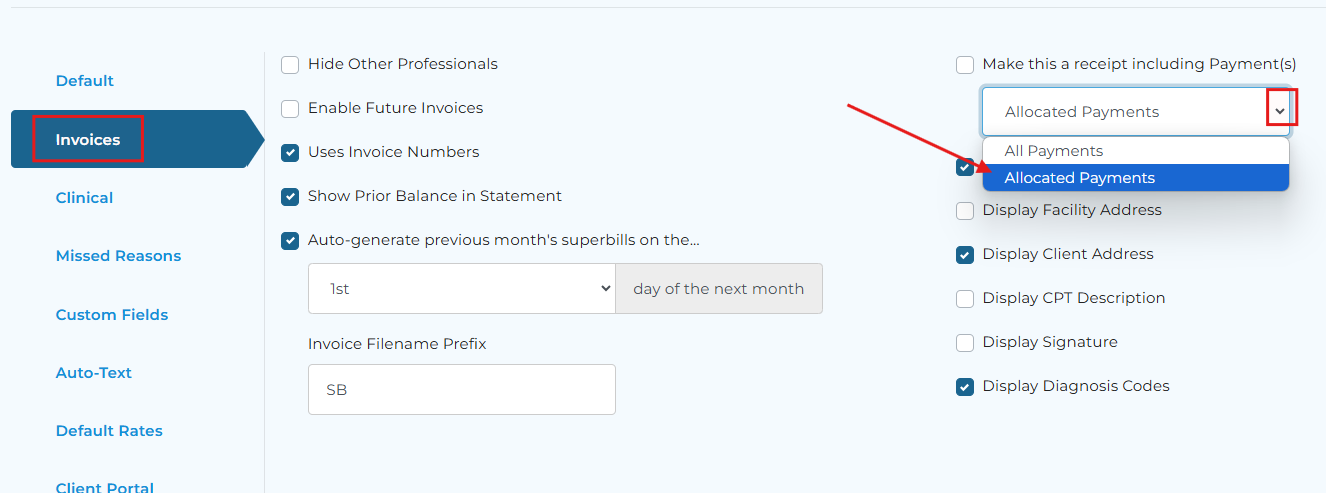
When turned on, the receipt will only show payments allocated to the chosen professional. Unallocated payments &/or payments allocated to another professional will not be available.
Related Articles
Granting Additional Providers Access
To grant additional providers access to a client chart, navigate to the client’s chart ➡️ select the Professionals tab on the left ➡️check off any additional professionals' names.Auto-Allocation
Auto Allocation: How to Automatically Apply Payments to Outstanding Balances Overview Auto Allocation is a convenient tool in My Best Practice that allows you to automatically apply a payment to the oldest outstanding appointment balances on a ...Managing Offline Payments
Recording Payments Not Collected Through MBP Managing finances efficiently is crucial for every practice, especially when it comes to accurately recording offline payments. This article will guide you through the necessary steps to record payments ...How to Turn On Automatic Receipts for Client Credit Card Payments
Providing clients with timely payment receipts is an important part of maintaining transparent, professional financial communication. My Best Practice makes this easy by allowing practices to automatically send receipts whenever a client’s credit ...Turning On Auto-Pay & Understanding How It Works
UNDERSTANDING THE SPECIFICS OF AUTOPAY Autopay will run each evening for the TOTAL CLIENT BALANCE around 10 PM EST based on the following criteria: Autopay is TURNED ON for the client; The client has an OUTSTANDING BALANCE DUE; and The client had an ...