Viewing the Client List
Within the Client List, you will see five columns: 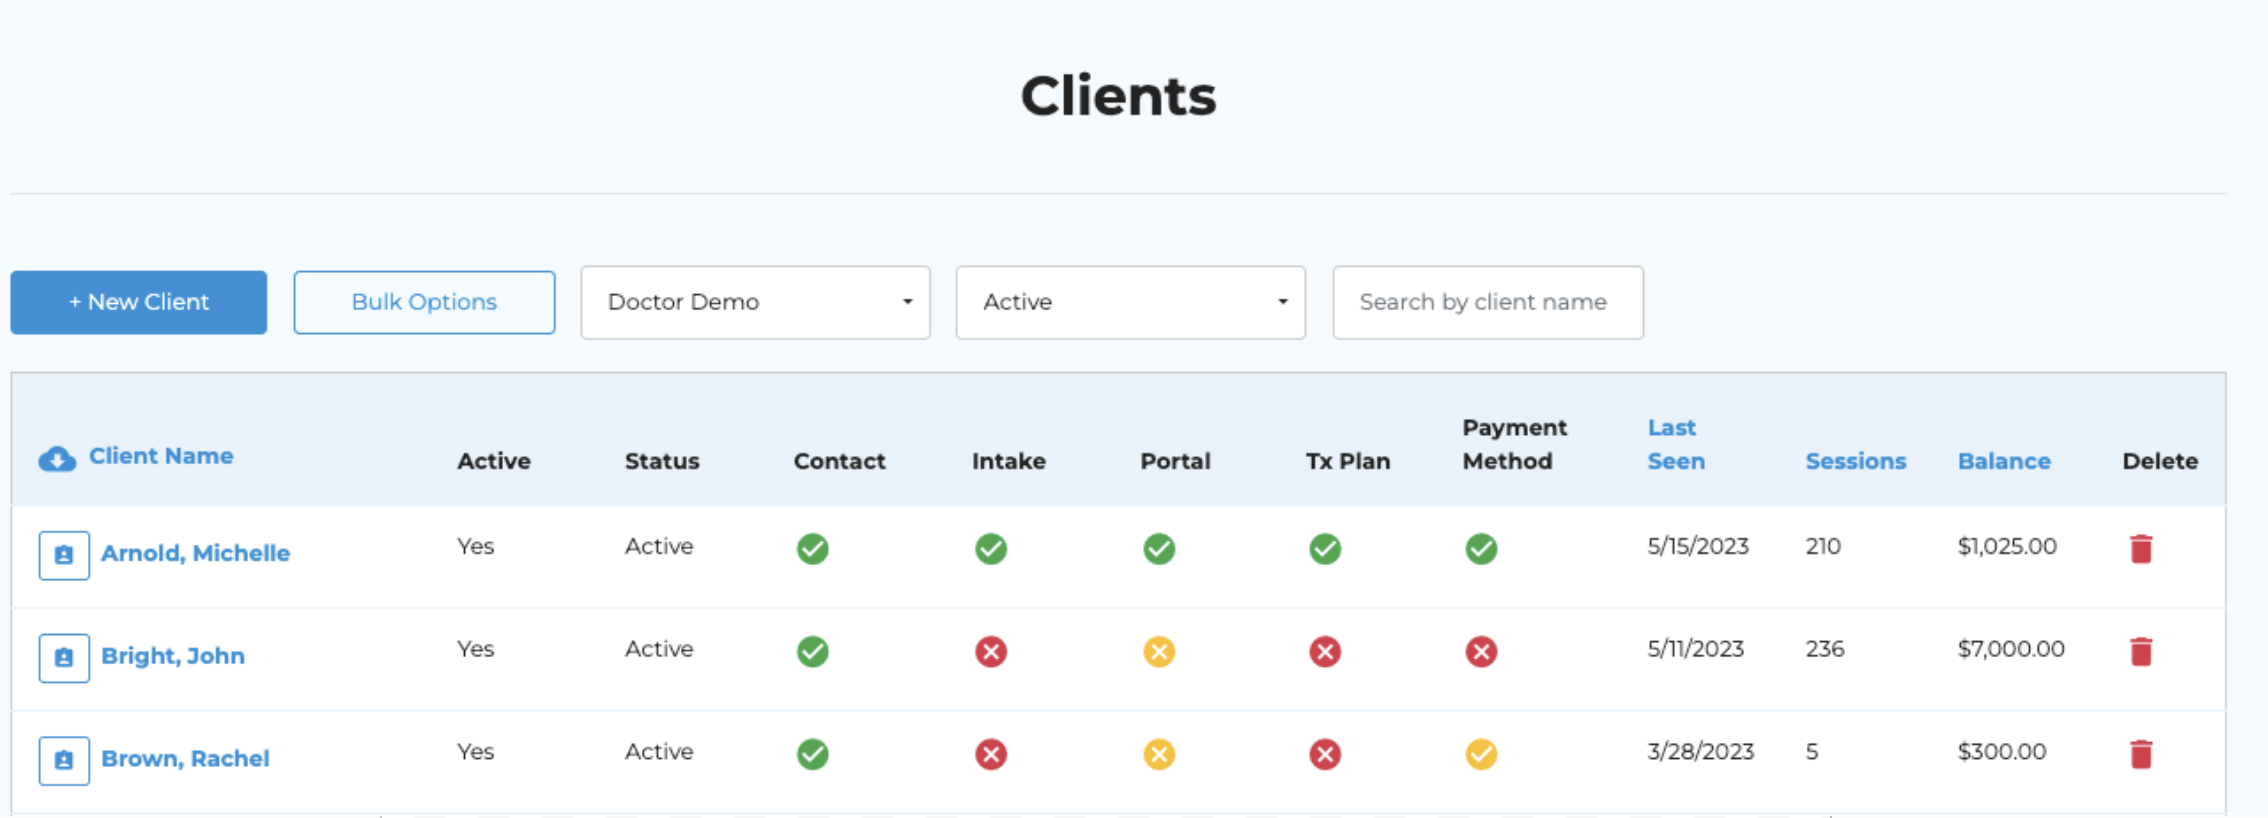
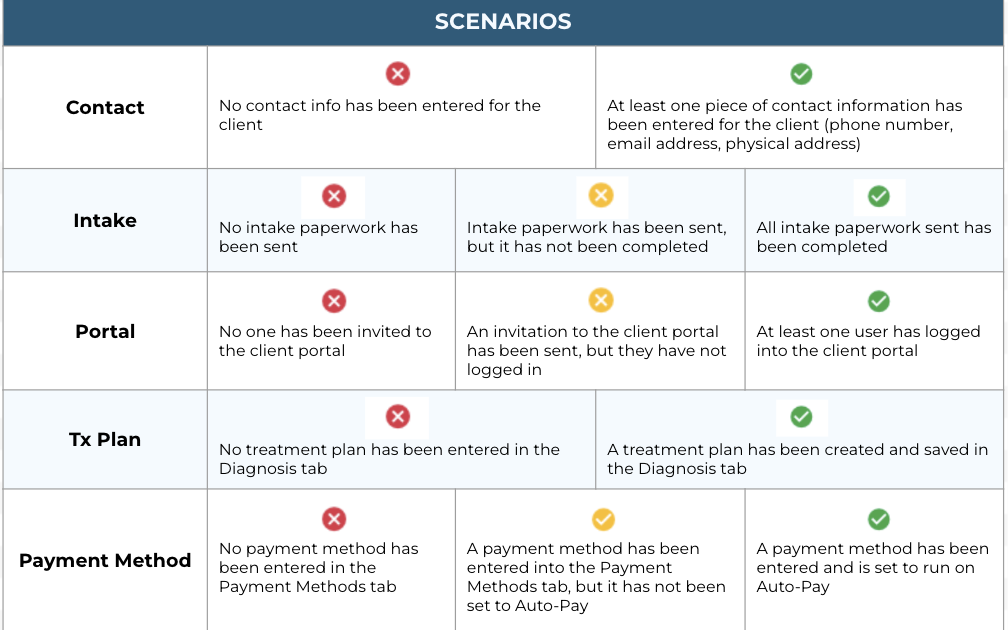
- Contact
- Intake
- Portal
- Tx Plan
- Payment Method
For every active client, there will be icons in each of these columns indicating their status.
Related Articles
Creating Client or Staff Groups
STEP 1: Navigate to the GROUPS tab within the Account Settings section. STEP 2: Click on the +Add New Group button. STEP 3: Complete the fields within the Name & Description tab. Display group appointments on all staff calendars = appointment will ...Viewing Completed Surveys
You can view all completed surveys for an individual client at any time within their client profile --OR-- you can use the Surveys to Review tool within the To-Do List to view all recently completed surveys. Please note: these surveys will be removed ...Client Portal: View Upcoming Appointments
Now, clients can view a list of upcoming appointments by selecting the More button on the right-hand side of their Next Appointment on the client portal.Client Balances Report Within the To-Do List
Step 1: Navigate to the To-Do list on the main menu. Then, select the tab labeled Client Balances. Here you'll find five search boxes designed to outline your search parameters. The middle box dictates which report you would like to run. Client ...Updating Client Status
Navigate to the Client Overview page within their chart. Then, scroll down to Status. Here, select the drop-down and choose the client's updated status. I.e., Inactive, Active, Wait List, Prospect.