Client Portal - Enable Profile Completion Settings
You can Enable Profile Completion Settings to help prompt your clients to finish setting up their client portals.
Step 1: Navigate to Account Settings
Step 2: Click on "Edit" for your Practice Settings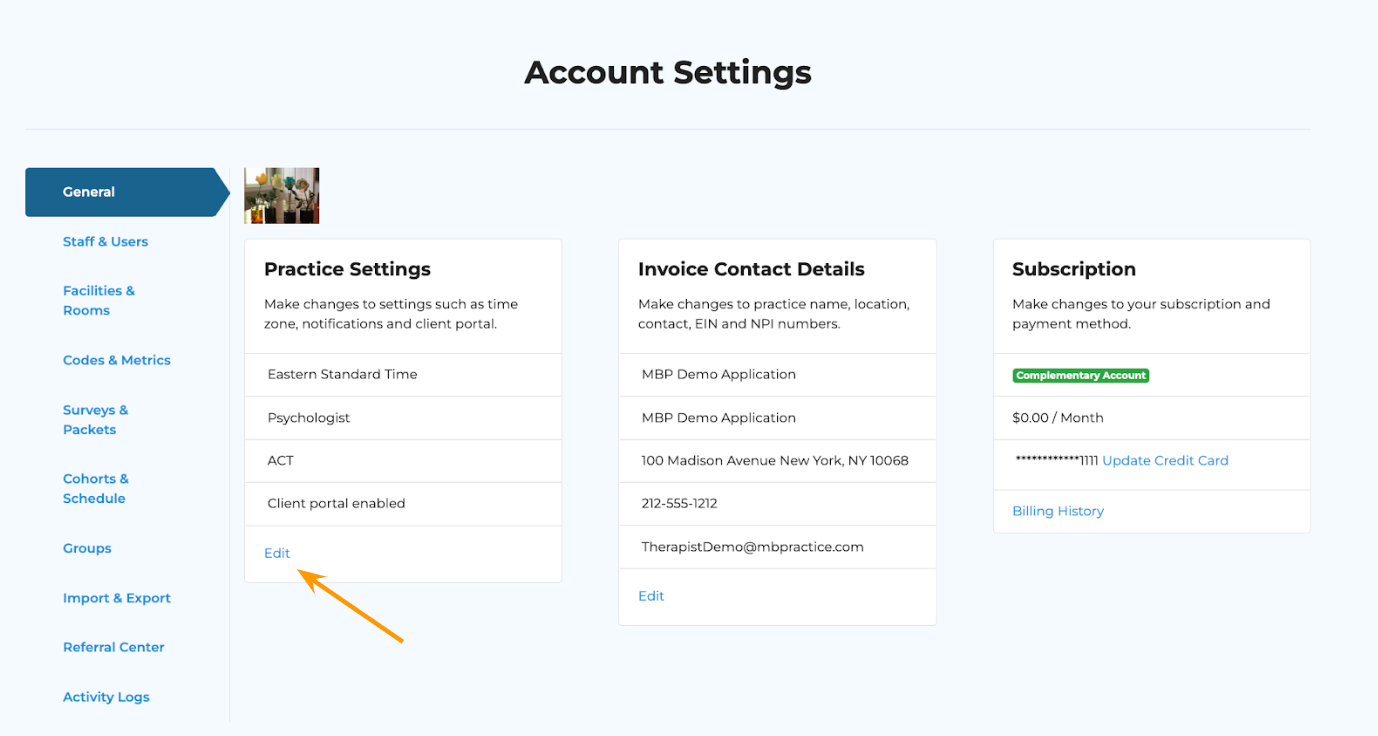
Step 3: Choose the "Client Portal tab". Then, click on "Profile Completion Settings"
Step 4: Click "Enable Profile Completion"
Step 5: Choose which items to include for profile completion
- Client Information -- This will prompt the portal user to enter the client's Date of Birth
- If one has already been entered for them on the provider-side, then this item will already be marked as completed.
- Contact Information -- This will prompt the portal user to enter their phone number and address
- If a phone number AND address have already been added to the client's profile on the provider-side, then this item will already be marked as completed.
- Emergency Contact -- This will prompt the portal user to enter an emergency contact phone number and address.
- Notifications -- This will prompt the portal user to choose whether they want to receive text or email appointment reminders.
- The number of days in which the reminder will go out for all clients is configured at the practice settings level (Configuring Practice Settings)
- Payment Methods -- This will prompt the portal user to enter their credit card information, which will be securely stored and can be used to collect payment from within MBP
- Insurance Plan -- This will prompt the portal user to enter their insurance information including a picture of the front and back of the card.
 Please note -- this option will only be available if you have completed the application for our integrated e-payment system (Submitting Application for E-Payments)
Activating Profile Completion means that clients, upon logging into the Client Portal, will encounter prompts for required information at the upper right corner.
This section will also display the percentage status of their completion progress.
Client Portal Example:
Step 6: Press "Save Changes"

Note: Once saved, the changes will automatically update for all existing and new client portal users.
 Please see the following video example of what your clients will see upon logging into their client portals: Complete Your Profile - MBP
Related Articles
Granting Client Portal Access
Navigate to the Client Portal tab on the left-hand side. Click the +Add New User button Enter the new user's information If you have already entered the new user's email in the Contact Info tab, their email address will populate for selection in the ...Client Portal Guide: Portal Permissions
Basic Functions - Enables the portal user to access the overall portal settings, ability to view the "Client Portal Banner Message" from the practice and/or the specific professional, view the "Upcoming Appointment" banner, and interact with the ...Adjusting Calendar Settings
STEP 1: Navigate to the Calendar tab. STEP 2: Click on the three horizontal lines icon in the top left-hand corner of the calendar to generate the Calendar Settings pop-up. STEP 3: Make the desired changes to your calendar settings. Professional(s): ...Client Portal Guide
Step 1: Clients will receive an email for the enrollment in the Client Portal. Take the next step by clicking the 'Enroll in Client Portal' button provided in the email. Step 2: After clicking the link, clients will be directed to the Client Portal ...Client Portal: Time Zone Update
Once logged into the client portal, navigate to Settings and select Change Time Zone. Here, you will select your time zone and Save Changes. Updating your account to the proper time zone will update the appointments on your Scheduling tab based on ...