Client Portal Guide: Enrolling Additional Portal Users
Step 1: Navigate to the client’s chart.
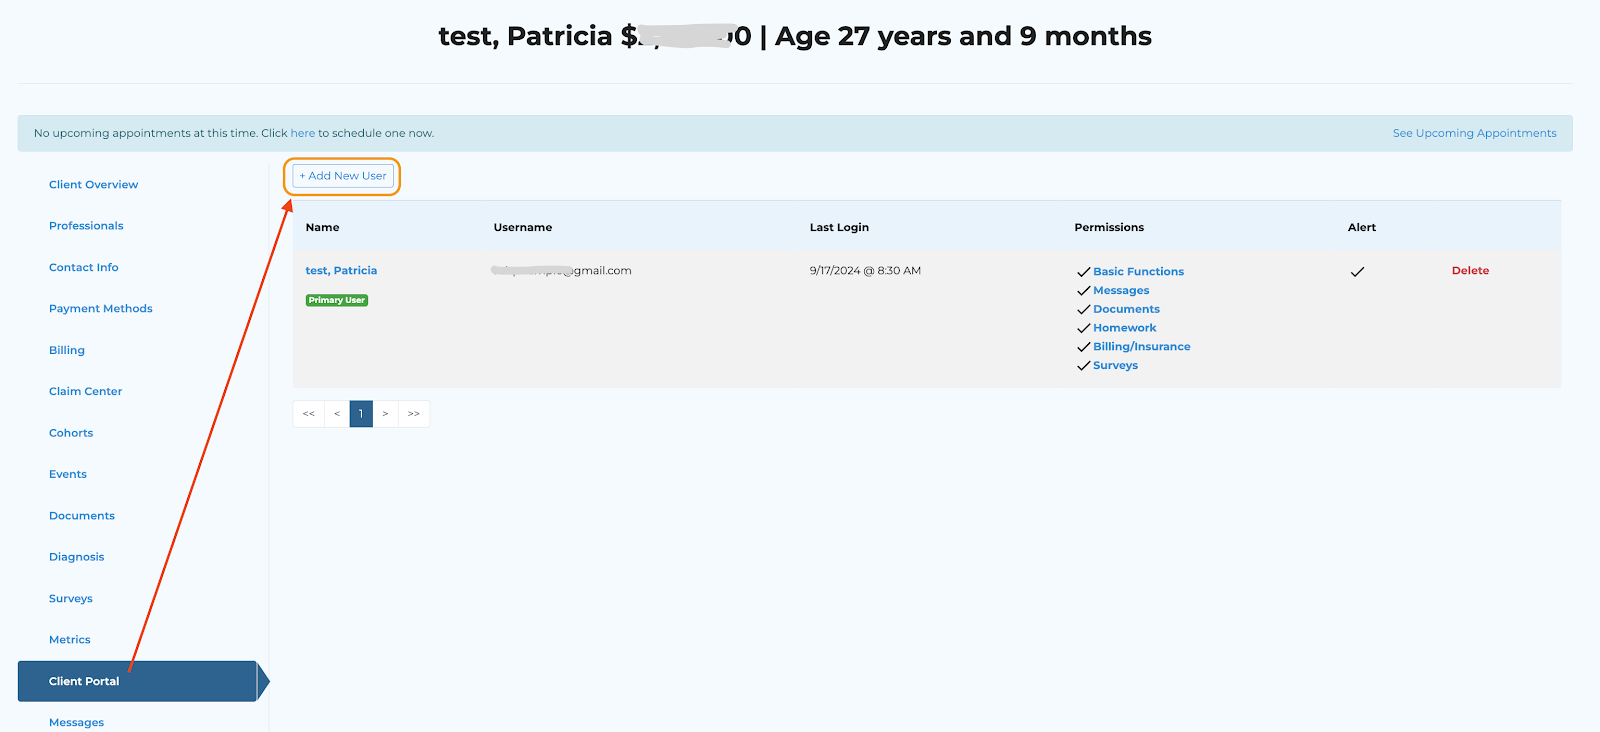
Step 2: Select the Client Portal tab and click + Add New User.
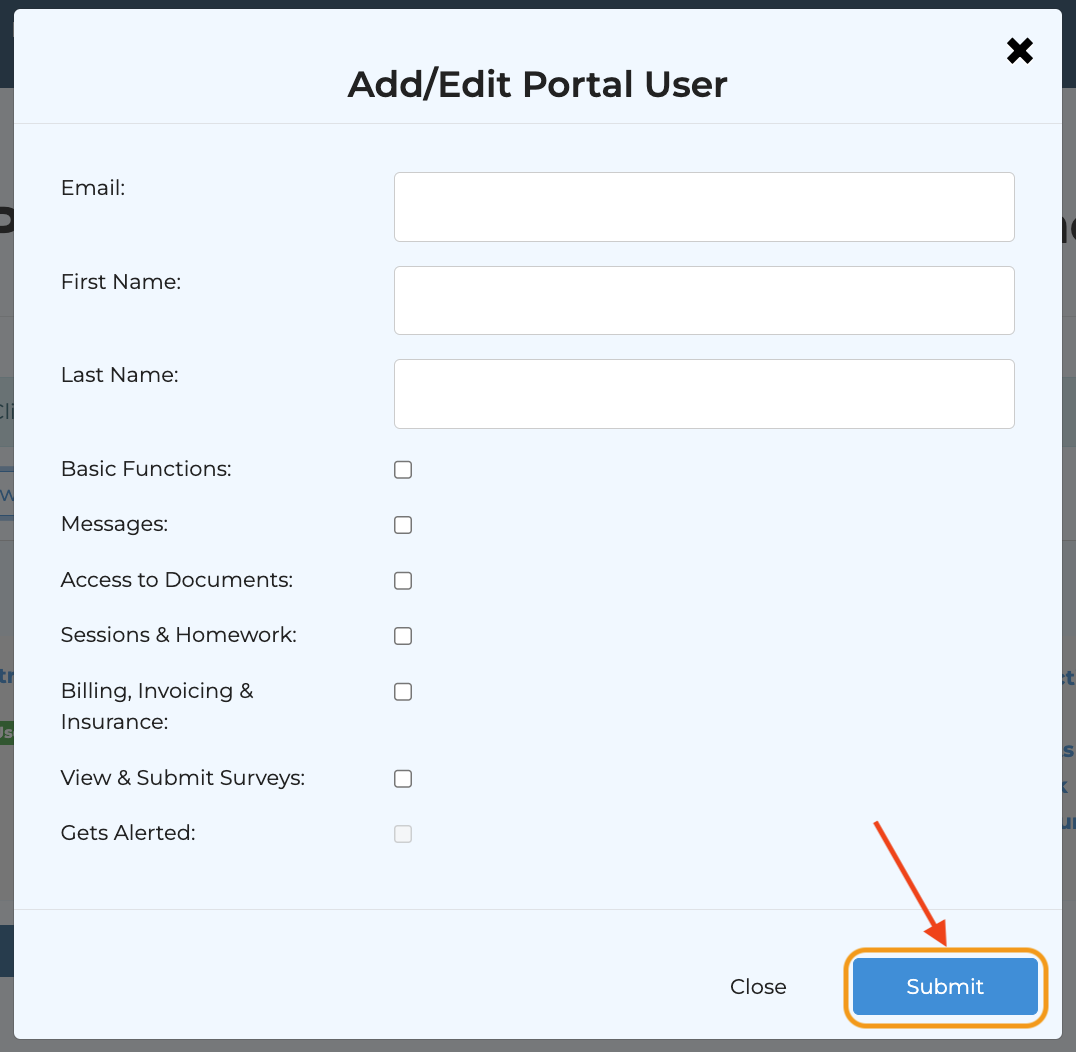
Step 3: A pop-up box for Add/Edit Portal User will appear. First, enter the user's details. Then, check the necessary box(es) to grant proper account permissions. Review Client Portal Guide: Portal Permissions. Once submitted, the new user will receive an email invitation.
Related Articles
Client Portal Guide: Portal Permissions
Basic Functions - Enables the portal user to access the overall portal settings, ability to view the "Client Portal Banner Message" from the practice and/or the specific professional, view the "Upcoming Appointment" banner, and interact with the ...Granting Client Portal Access
Navigate to the Client Portal tab on the left-hand side. Click the +Add New User button Enter the new user's information If you have already entered the new user's email in the Contact Info tab, their email address will populate for selection in the ...Client Portal Guide: Adding a New Client (Enrolling Contact in Portal)
This feature is helpful when a minor or other client relies on a parent/guardian to assist in completing tasks. I.e., they do not have an email address or cannot access a computer on their own. If the client has an email and can access a computer, ...Client Portal: View Upcoming Appointments
Now, clients can view a list of upcoming appointments by selecting the More button on the right-hand side of their Next Appointment on the client portal.Granting Additional Providers Access
To grant additional providers access to a client chart, navigate to the client’s chart ➡️ select the Professionals tab on the left ➡️check off any additional professionals' names.