Creating Client or Staff Groups
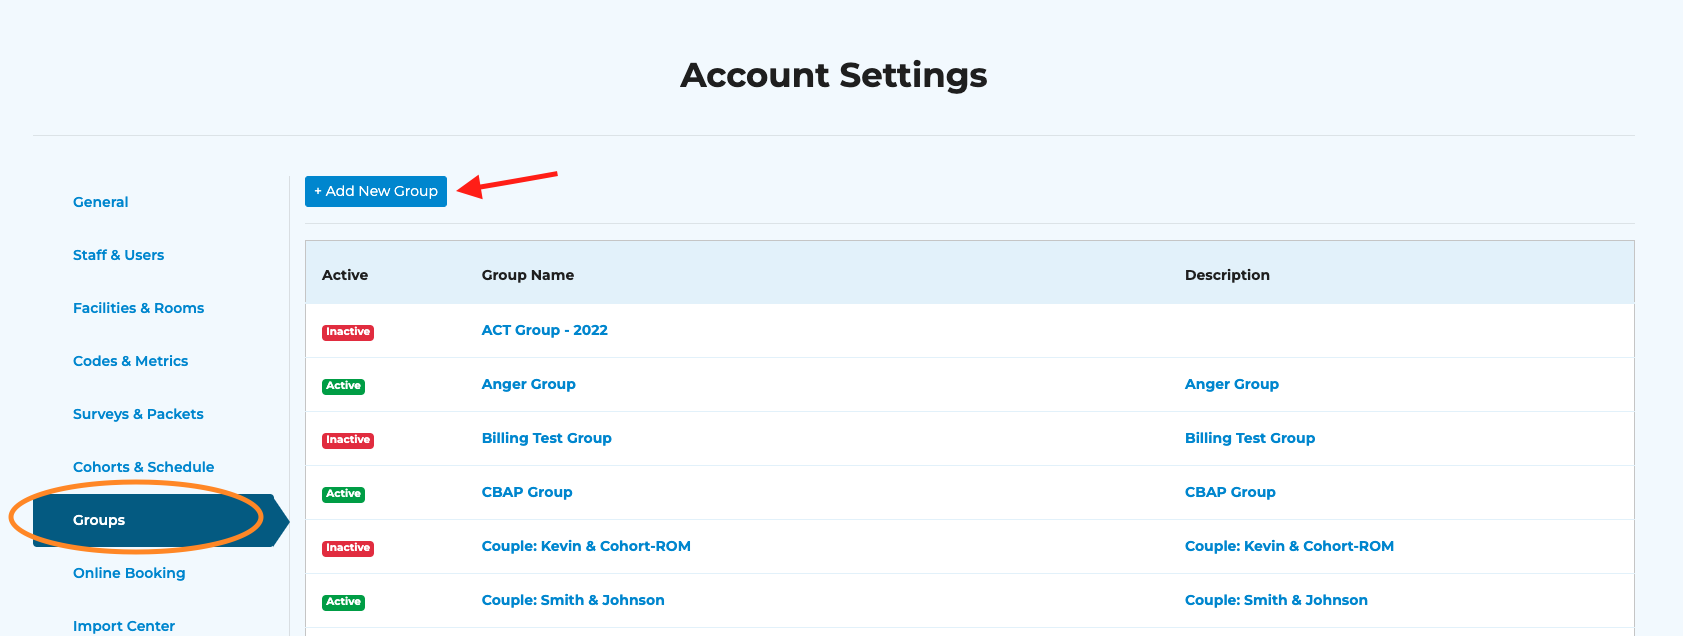
STEP 1: Navigate to the GROUPS tab within the Account Settings section.
STEP 2: Click on the +Add New Group button.
STEP 3: Complete the fields within the Name & Description tab.
- Display group appointments on all staff calendars = appointment will appear on the calendar of all staff members listed on the Staff tab.
- Select Client or Staff Group
- Client groups = groups consisting of clients
- Staff groups = groups consisting of staff
- Group Name→ This will be the name that staff see when viewing the list of existing treatment groups and when scheduling group sessions.
- Clients will not be able to see this group name
- Group Description→ This will be the description seen by users when viewing the list of existing treatment groups.
STEP 4: Add clients to the treatment group.
- To add clients to the group, click on the Clients tab.
- You can add clients by either searching for them in the search bar on the left-hand side OR you can use the dropdown to manually select from your list of active clients.
- Upon clicking on the desired client, a black check mark will appear next to their name (allowing you to select multiple clients to add to the group at once).
- Once you have selected the clients you would like to add, press the Add button.
- The selected clients will populate in an alphabetical list below.
- To remove a client from a group, simply press the “Remove” button on the right-hand side.
- For groups with many clients, you can use the search bar on the right-hand side to search for clients who have already been added to the group.
STEP 5 (OPTIONAL): Adjust the service fee for specific clients.
- If there are group members who will be responsible for a different fee than the rest of the group, you can click on the "Services" button to enter the proper CPT code and the associated service fee for that specific client.
- If the fee is going to be the same for all members of the group, you can skip this step. You will enter the standard fee for all members of the group when scheduling the group session.
STEP 6: Assign at least one professional to the group.
- If only one person is going to be working with this group, simply select only their name from the dropdown.
- If multiple staff will be working with the group, you can select them all from the dropdown.
- These selected staff will have access to scheduling with the group.
- If there is a "group leader," we recommend assigning the appointment to that person when entering the appointments on the calendar.
- The professional assigned to the appointment on the calendar will be the professional whose name and credentials are listed on the superbills for those group sessions.
- Edit/Delete Group Appointments = enabled staff members will have the ability to edit and/or delete group appointments. If disabled, they will not have the ability to do so.
STEP 7: Schedule your group!
- You can now select this group from the client dropdown list when adding a new appointment to the calendar. Groups will be listed at the very bottom of the list.

For information about our group note feature, please see the following guide: Writing a Group Note
Related Articles
Adding a Collateral Client to an Appointment
Collateral clients added to a primary client’s session, will not have a record of the session in their chart or be billed. If you prefer to have a record for both clients see Creating Client or Staff Groups. Create a new session and add the primary ...Creating/Managing/Scheduling Client Groups (Treatment Groups, Couples, or Families)
"Groups" in MBP refers to any appointments that include multiple clients -- IOPs, treatment groups, couples, or families.User Settings Within Staff & Users
First, choose the type of user: Standard User limited access (select additional professionals this user has access to) Basic Administrator have access to all data, but cannot make changes to account level settings. Full Administration have access to ...Creating Non-Client Appointments
Step 1: Navigate to Account Settings - Facilities and Rooms to create a facility called ‘Non-Client Appointments. Step 2: Add room(s) to the Non-client Facility. I.e., CLOSED, Personal, Holiday, Vacation. (You will still be able to add a title when ...Adding a Client
Step 1: select the Add Client button at the top right. Step 2: complete all of the necessary information to enroll your client. To quickly add a client to the system you only need their name. Uncheck “Enroll in Client Portal” See Enrolling Contact in ...