Notify Clinician When First Appointment is Scheduled for a Client
When turned on, the clinician will receive an email notification of a client's first scheduled appointment.
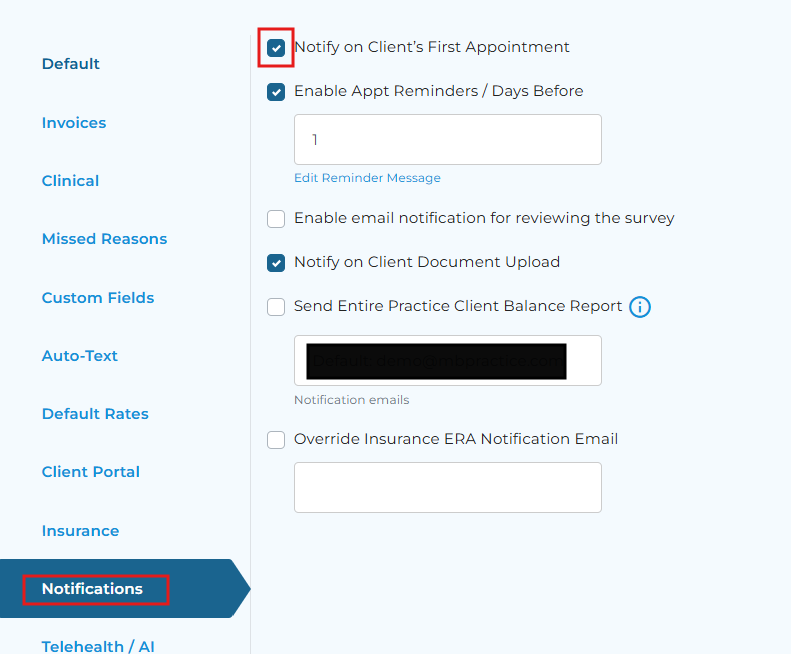
Step 1: Navigate to Settings - Account Settings - Practice Settings.
Step 2: Select the Notifications tab. Then, check-off ‘Notify on Client’s First Appointment.
Related Articles
Adding a Collateral Client to an Appointment
Collateral clients added to a primary client’s session, will not have a record of the session in their chart or be billed. If you prefer to have a record for both clients see Creating Client or Staff Groups. Create a new session and add the primary ...Updating Client Time Zone
Navigate to the client chart ➡️ Overview tab. Scroll down to the Time Zone, select the proper time zone, and select Save Changes. Updating the clients time zone will update their appointments to the proper time based on their time zone. This will ...Setting Up Appointment Reminders
You can enroll in appointment reminders to be sent via text message within your portal. STEP 1: Login to your portal and click on the Notifications tab. STEP 2: You'll then be able to click on the button to enable notifications and enter the mobile ...Customizing Appointment Reminders by Facility
You’ll now be able to include specific text within the text/email reminders based on the facility/room assigned to the appointment — ensuring that telehealth clients receive your telehealth information and in person clients know which office location ...Adding / Editing Admin Notes within an Appointment
Quickly add and view administrative notes within your client appointments to provide more context or to include important reminders. Step 1: Create an appointment on the calendar and select add under Admin Notes:. Step 2: A rich text field will ...